Your first app in 15 minutes
This guide builds a complete, small application: an event registration. By the end, people can register through a link, automatically receive a confirmation, and you can see the current state at a glance.
Along the way you'll touch all four building blocks of ApptiveGrid — Grid, Form, Flow, and Page.
1 · Create a Space and Grid (2 minutes)
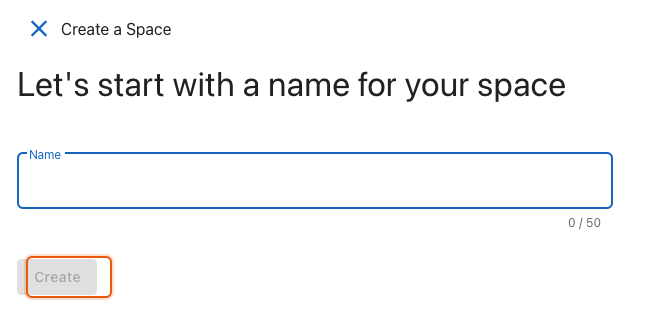
- In the overview, click Create new Space and name it
Events. - Then create the first Grid:
Registrations.
2 · Create fields (3 minutes)
Use the + at the right end of the column headers to create these fields:
| Column name | Column type |
|---|---|
Name | Text |
Email | |
People | Number |
Status | Single Select with the options New, Confirmed, Cancelled |
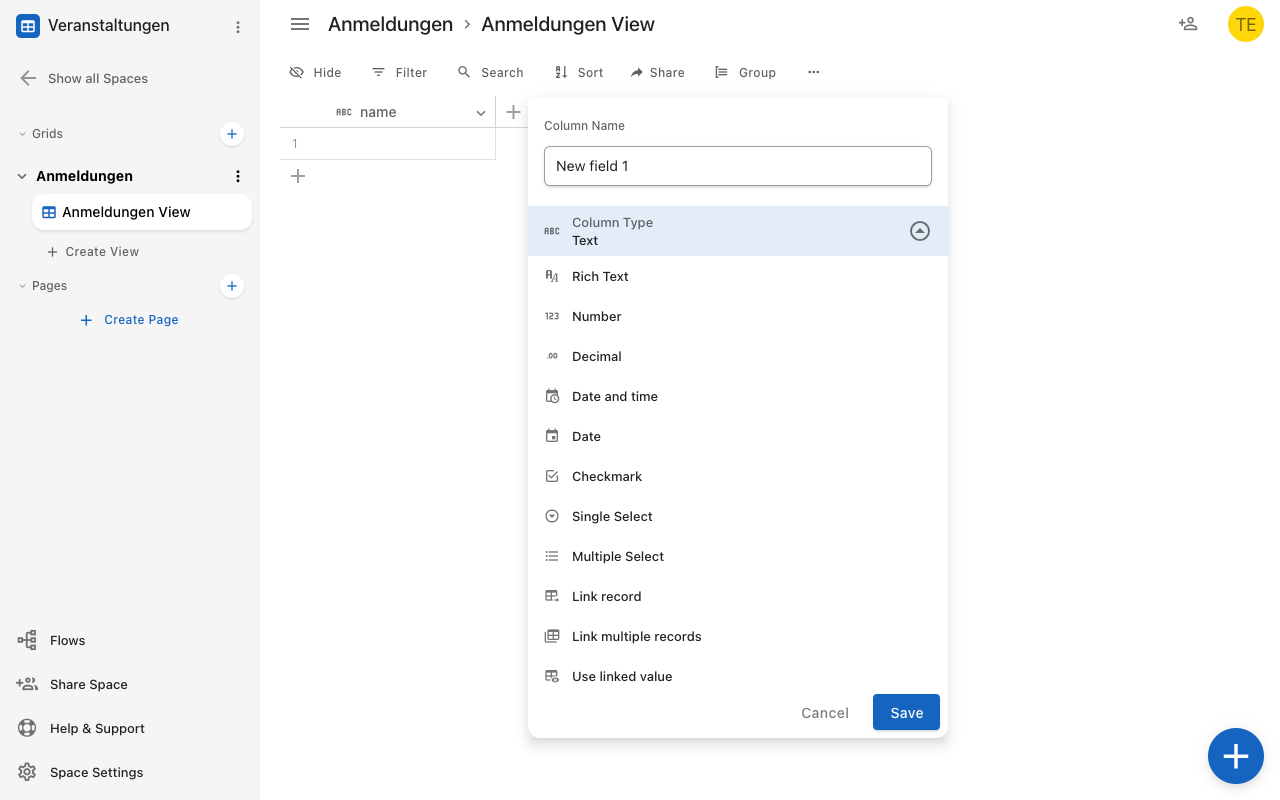
You choose the type while creating the column:
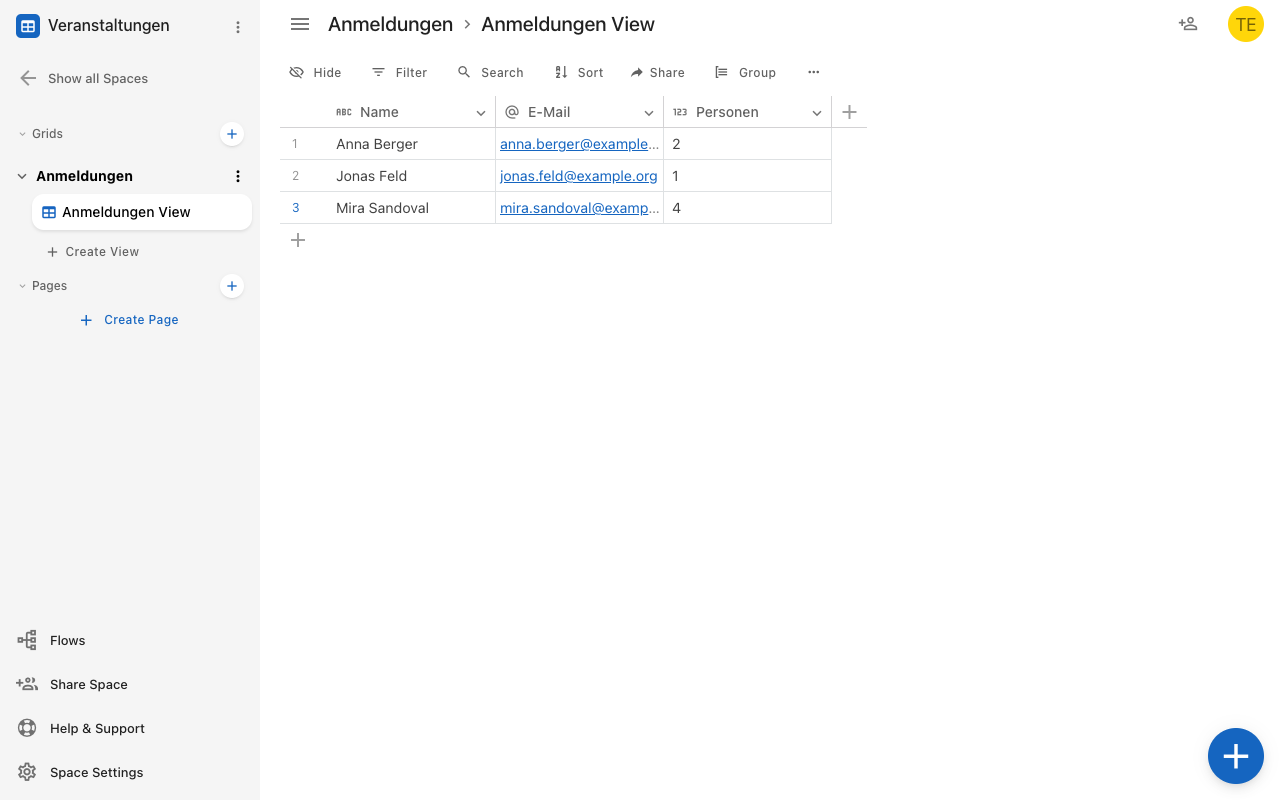
The Grid then stands with its fields in place:
The type is the most important decision
An email field validates the input, a number field can be summed, a single select later becomes the columns of a Kanban board. Text can't do any of that.
3 · Create a Form (3 minutes)
- In the sidebar under the Grid, choose Create form and name it
Registration. - Use Add fields to add the
Name,Email, andPeoplefields — notStatus. - Set
NameandEmailto Required field. - On the Layout tab, enter a title, such as
Summer Party Registration.
Status doesn't belong on the form
Status is an internal value you assign — not the registering person. Anything the form doesn't ask for stays empty on submission.
4 · Share the Form (1 minute)
- Click Create link.
- Copy the link — or use the QR code.
- Test the form yourself via Preview in new tab.
The link is public by default
Anyone with the link can fill out the form. For a summer party, that's exactly what you want. For internal or sensitive forms, set Configure restrictions first.
Submit the form once with your own address. The Entry appears in the Grid right away.
5 · Automate the confirmation (4 minutes)
- In the sidebar, open Flows and click Create flow. Name it
Send confirmation. - On the Trigger tab, choose Entry via form, then pick the Grid and Form.
- On the Actions tab, choose Email and connect it to the trigger.
- Configure the email:
- To: use Use values from previous steps to pick the
Emailfield - Subject:
Your registration has arrived - Content: fixed text, with the
Namefield inserted
- To: use Use values from previous steps to pick the
Test before going live
Use Test flow — the step uses the last row of the Grid, which is your own test entry.
A test run is not a dry run: the email really goes out. That's why using your own address as the test entry matters.
Check the History tab to confirm the run has the status Done.
6 · Get an overview (2 minutes)
Add two more Views on the same Grid:
Kanban by status — shows registrations as cards in the columns New, Confirmed, Cancelled. Cards can be moved by drag and drop.
"Open" table — a Grid View with the filter Status equals New.
All Views show the same data
You're not creating copies. Change an Entry in the Kanban board, and the change is immediately visible everywhere.
In the table, use the summary row to show the Sum of the People column — now you know at a glance how many people are coming.
What you have now
Space "Events"
│
├── Grid "Registrations"
│   ├── View "All registrations"    (Table)
│   ├── View "Open"                 (Table, filtered)
│   ├── View "By status"            (Kanban)
│   └── Form "Registration"         → shared publicly
│
└── Flow "Send confirmation"
    ├── Trigger: Entry via form
    └── Action:  Email
A working application: capture, automation, and an overview.
Natural next steps
| Goal | Path |
|---|---|
| Link registrations to a person | Second Grid Events, linked |
| Publish an attendee list | Page with an embedded View |
| Bring colleagues on board | Invite people |
| Handle cancellations automatically | Flow with trigger Entry was updated |
| Confirm only after review | Pages in flows |
Next
- What is ApptiveGrid — the terms in context
- The interface at a glance
- Start with a template